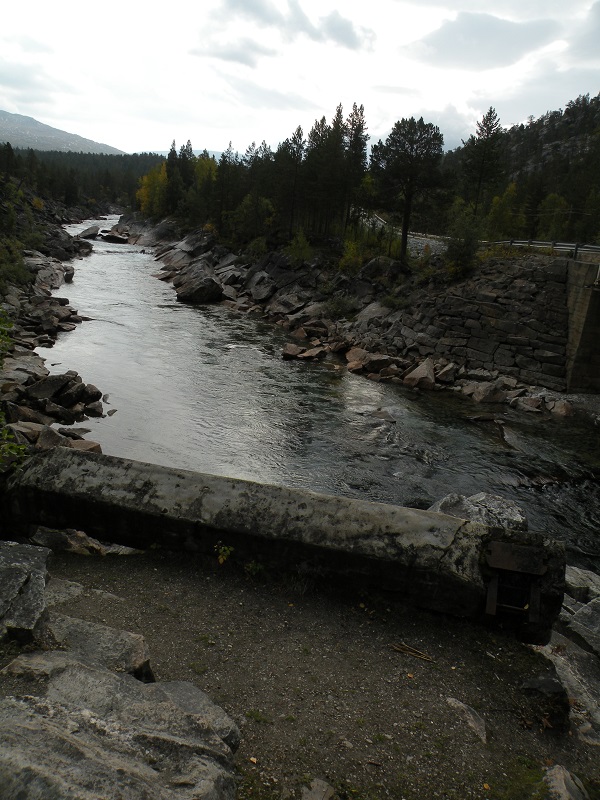
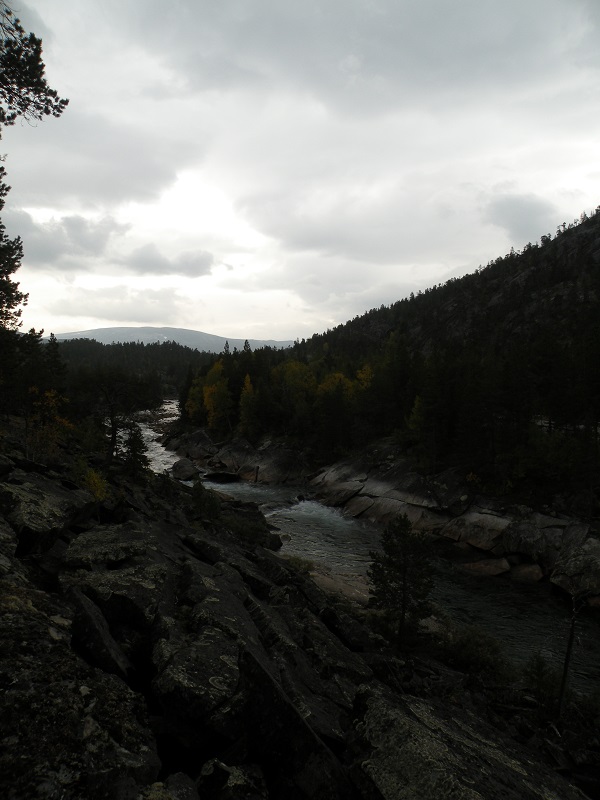
By this bridge at the rise of the mountain British forces tried to halt the advancing Gebirgsjägers in late May 1940. They blew up the bridge and hastily prepared some defensive positions on the northern side of the river. They wasn`t meant to stop the German troops here , just delay them so better positions could be arranged further north.
When the experienced montain troops attacked there was only a short fire fight and shelling with mortar grenades before the Allied troops broke loose and retreated. Two British soldiers lost their life here.
When the experienced montain troops attacked there was only a short fire fight and shelling with mortar grenades before the Allied troops broke loose and retreated. Two British soldiers lost their life here.
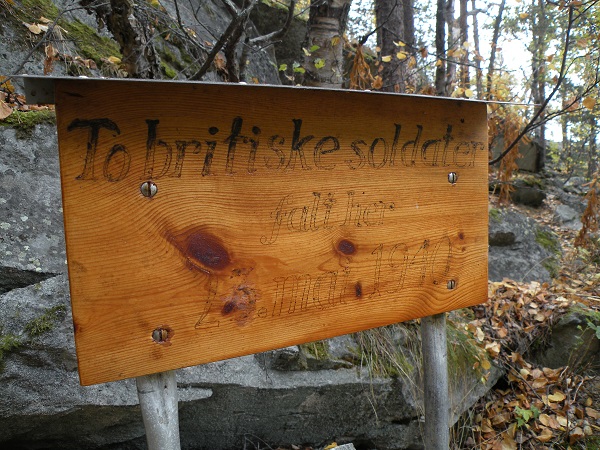
Two British soldiers fell here. 23.May 1940.
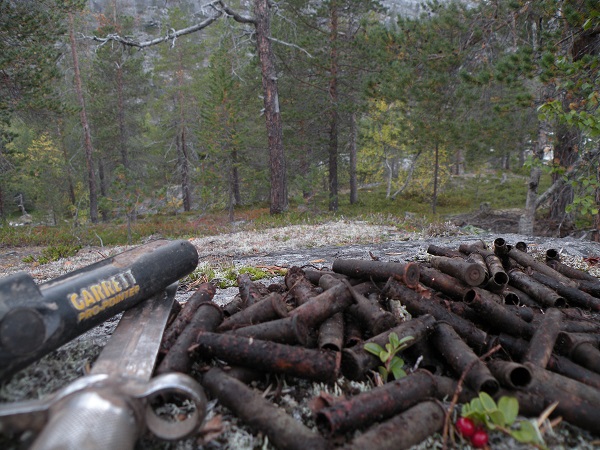
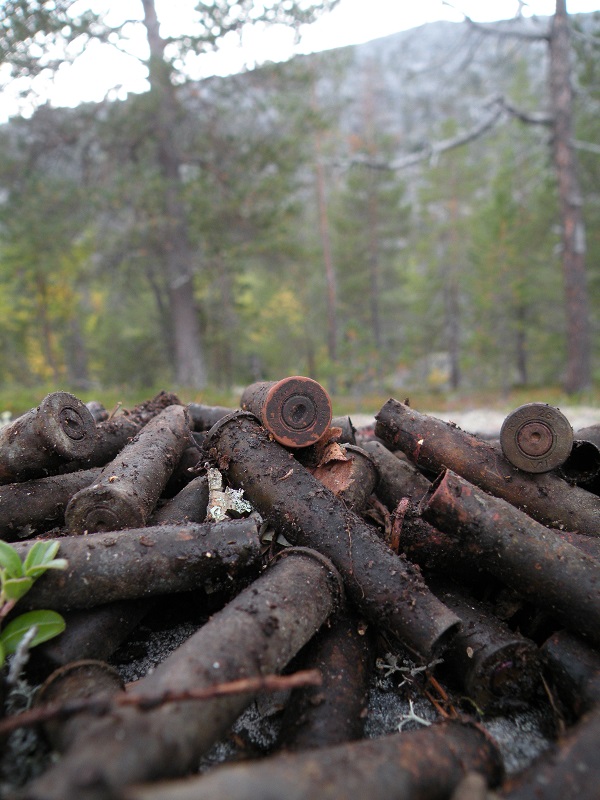
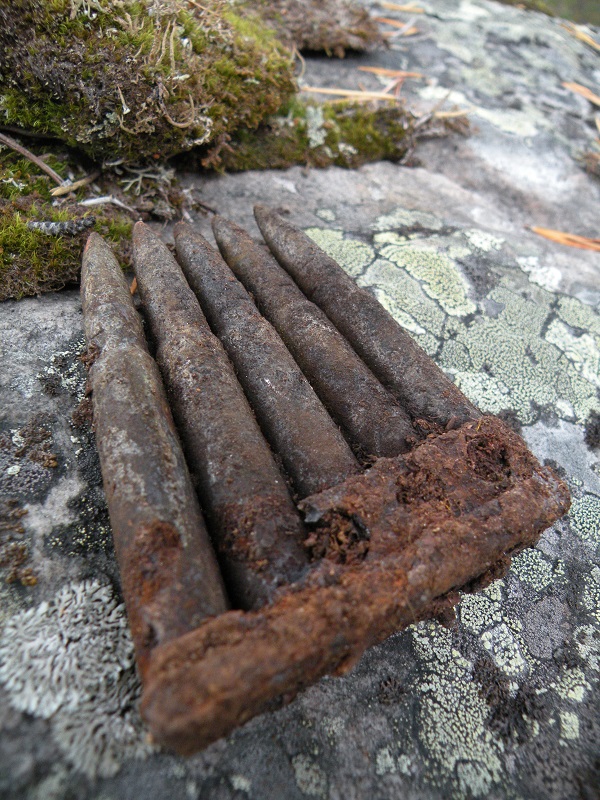
Me and a friend made a trip up to the area to see if we could locate any of the British positions and maybe find some evidence of the fighting. After a short recce of the northern side of the river we got a good signal from the Fisher F5. I have become more and more familiar with this detector and bet my car on that it was rifle casings , and luckily I didn`t have to hand over the keys. At first we found just a couple of casings , but then we moved to a sort of natural trench in the mountain and found the main fighting position. It was a very nice defensive position with a good view of the area oposite the river. Here was a bunch of casings and a couple of food tins. As we moved along the position we had more of the same and the last signal we dug was a full .303 stripper clip one of the soldiers must have lost in the retreat.
About two hundred meters to the south-east of the main position we found a couple of positions protecting the flank. In one of these there was signals from casings and the striker marks showed it had been fired with a Bren gun.
About two hundred meters to the south-east of the main position we found a couple of positions protecting the flank. In one of these there was signals from casings and the striker marks showed it had been fired with a Bren gun.

Two views from the main position:
Note the different striker marks. The squareish one is of a Bren gun while the round one to the right is from a Enfield rifle.

The Bren position securing the flank.
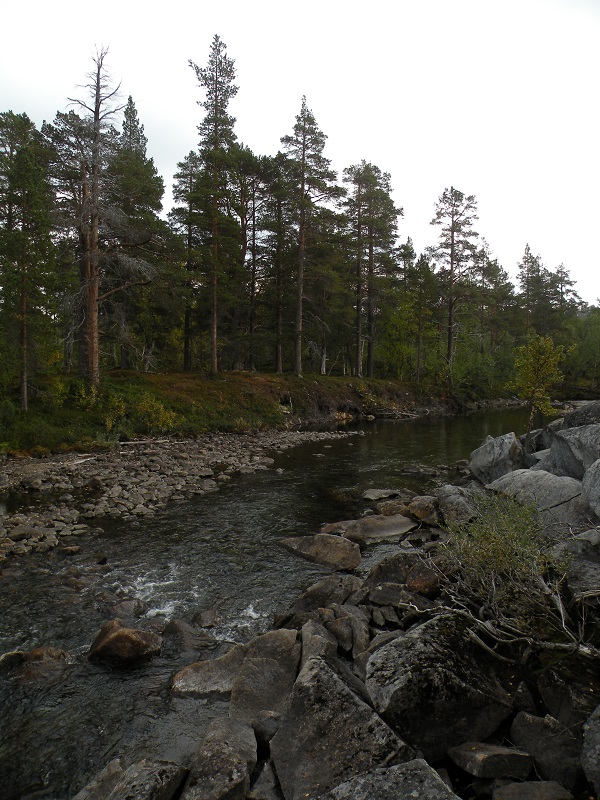
View from the Bren position.
Video:
 RSS Feed